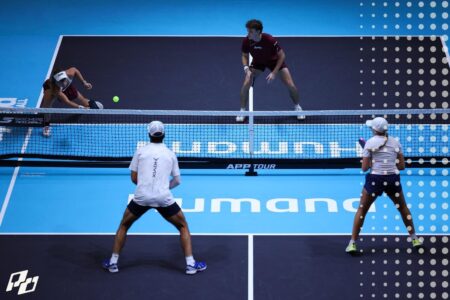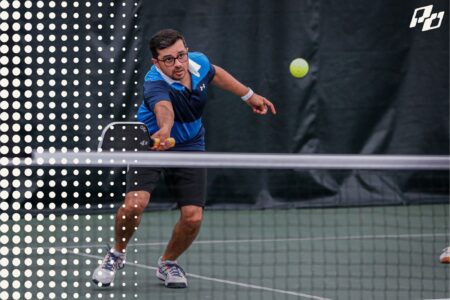

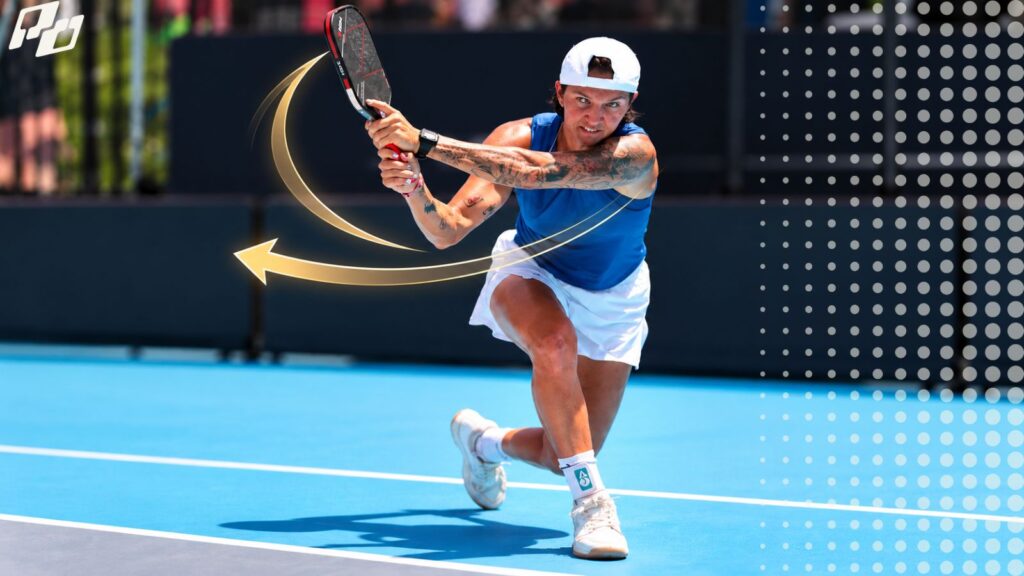
Your pickleball follow-through should match the shot. Dinks, resets, counters, and punch volleys need compact finishes, while drives, serves, and overheads use fuller follow-throughs. As a simple rule: softer shots finish smaller, power shots finish bigger, and fast exchanges require quicker paddle recovery.
A lot of recreational players know where to start the paddle. Far fewer know where it should finish.
That matters more than it sounds.
A dink that finishes across your opposite shoulder is probably too big. A drive that dies near your waist is probably being cut off. A punch volley that wraps around your body is probably leaving you exposed for the next ball.
The interesting part is that the finish itself does not magically control the ball after contact. Once the ball has left the paddle, it is gone. But the finish is a very useful receipt for what happened before contact. Sports-motor research makes the same distinction: follow-through cannot alter the ball after impact, but it helps complete and decelerate the movement and can reinforce distinct movement patterns.
That gives us a much better way to use follow-through: don’t manufacture a pretty finish. Use the finish to check whether the swing was the right size, shape, and direction.
And different pickleball shots should leave very different receipts.
A Quick Note on Forehands vs. Backhands
When I describe a forehand finish, don’t automatically assume the same finish applies to the backhand.
Some principles carry over — soft shots stay compact, power shots get a fuller finish, and fast exchanges demand quicker recovery — but the actual finish can be different because forehands and backhands use different swing paths, grips, and body rotation.
So throughout this guide, when a backhand needs a different finish, I’ll call it out specifically.
For example:
- A forehand drive may finish around the opposite shoulder.
- A two-handed backhand drive can finish across the body with more rotation.
- A one-handed backhand counter should stay much more compact and finish closer to the contact point.
The Big Rule: The Harder and Longer the Shot, the Bigger the Finish
Here is the framework I wish more recreational players were taught.
| Shot | Typical finish | Why |
|---|---|---|
| Dink | Compact, generally in front/on same side | Touch + fast recovery |
| Reset / block | Very little finish | Absorb pace, don’t add it |
| Punch volley | Short finish toward target | Redirect efficiently |
| Roll volley | Upward, compact | Add topspin without losing ready position |
| Third-shot drop | Forward/upward, controlled | Create arc without overswinging |
| Drip / aggressive drop | Toward shoulder | Blend penetration + topspin |
| Forehand drive | Shoulder / opposite shoulder area | Full acceleration + topspin |
| Two-handed backhand drive | Across body / around shoulder | Complete rotation and extension |
| Serve | High and through the target | Complete acceleration and weight transfer |
| Overhead | Across body toward opposite hip | Throwing-style deceleration |
That progression is not accidental.
As the shot gets softer and reaction time gets shorter, the finish generally gets smaller.
As the shot requires more acceleration, spin, and penetration, the finish generally gets longer and higher.
That is the real pattern.
1. The Dink: Keep the Finish in Front of You
This may be the most misunderstood one. A standard dink does not need a giant follow-through.
Zane Navratil teaches a contact point roughly a forearm’s length in front, with the follow-through staying compact rather than traveling across the opposite side of the body. That helps the paddle return quickly for the next ball.
For a basic controlled dink, think: contact in front → gentle extension → paddle remains in front
You might finish around waist-to-chest height depending on the ball and spin. The important part is that you have not wrapped the paddle around yourself.
If your ordinary dink regularly finishes at your opposite shoulder, you have probably turned a touch shot into a groundstroke.
But what about the “finish near your ear” dink?
This is where nuance matters.
On a topspin dink, some high-level players use a more vertical, same-side finish. Recent instruction describes that motion as a U or rainbow shape, with the paddle rising toward the ear on the paddle side rather than crossing the body.
So for a right-handed forehand topspin dink: right side → brush up → finish near right ear.
Not: right side → swing across → finish over left shoulder.
That distinction keeps the stroke compact while still creating spin:
Practical check
If you can immediately return the paddle to ready position without having to unwind your arm, the finish is probably about the right size.
2. The Reset: Sometimes the Correct Finish Is Almost Nothing
A reset is practically the opposite of a drive. You are usually receiving pace and trying to remove energy from the ball.
So a big follow-through often defeats the purpose.
Soft hands, controlled paddle angles, and absorbing the incoming pace can help you reset the ball without adding another full swing.
Your paddle may move slightly toward the target after contact, but it should not travel far. Think of it like catching an egg:
@fun.pickleball Mastering the transition zone is KEY to leveling up your pickleball game. 🔑 What the pros do better than anyone is getting to the kitchen when they are stuck in the mid-court and resetting the ball back into the kitchen when they are on defense. HOW TO RESET LIKE A PRO: 1. WIDE BASE AND GET LOW – Creates balance, stability and leverage 2. PADDLE DOWN (FAVOR BACKHAND) – Favoring the backhand allows you to cover more spots on your body 3. ABSORB THE PACE – The harder they hit at you, the less you need to swing Use this quick video to level up your transition zone play! SAVE this video if you want to stop popping the ball up! #fun #pickleball #goodvibes #reset #pickleballtips ♬ Edamame (Instrumental) – Animaux Et Paysage La Chaine
The paddle receives the ball, gives slightly, and stays relatively close to the body. If your reset finishes at your shoulder, chances are you didn’t really reset it. You hit it.
And that is often why the ball floats up.
3. The Punch Volley: Finish Where You’re Sending It
The punch volley is another compact stroke.
The paddle begins in front.
There is very little backswing.
You contact in front and make a short movement through the target.
So if you’re punching a forehand volley straight ahead, the paddle should finish slightly farther forward—not wrapped around your torso.
Minimize the backswing and follow through toward the target instead of making a large upward swing.
Picture a short jab.
Not a baseball swing.
This becomes especially important in hand battles because the next ball can arrive almost immediately. Analysis of high-level firefights emphasizes compact volleys and rapid recovery to the center rather than big follow-throughs.
A good finish should leave you one small movement from ready position.
@calliejosmith_pickleball Want to know a secret? 🤫 A successful punch volley doesn’t involve a big, out-of-control backswing. 🔑 The key to a great punch volley is keeping your swing compact and tight in front of your body! This gives you both power and control. Should I share a side-by-side comparison? Let me know! • • • • • • • #pickleball #pickleballaddict #pickleballer #pickleballwarmup #pickleballtips #pickleballshots #pickleballtechnique #pickleballaddiction #pickleballusa #pickleballislife #pickleballtiktok #pickleballtiktoks #pickleballtok ♬ bambam – babyspoon & Melo Nada
If you have to bring your paddle back from somewhere behind your shoulder, the finish was probably too big.
4. The Roll Volley: Up More Than Around
A roll volley has more swing than a punch volley because you are trying to create topspin.
But you still don’t want a full baseline forehand. The paddle starts below the ball and brushes upward. The finish rises, but it stays relatively compact so you can recover for the next exchange.
A useful visual is: low → up → ready.
Rather than: low → across the entire body → admire shot.
The more aggressive the roll, the farther that finish can naturally travel, but kitchen geometry still rewards compactness.
Your opponent is only 14 feet away. You don’t have time for a theatrical finish.
5. The Third-Shot Drop: Finish Upward, Not Across
The drop confuses a lot of players because it is soft, but it still needs a committed swing path.
Following through upward rather than simply driving forward can help create the arc needed to clear the net and drop into the kitchen.
The finish should therefore be:
- smooth
- upward
- controlled
Often somewhere from waist to chest height, depending on how low the contact was and how much topspin you’re creating:
The classic mistake is stopping the paddle at contact. That produces the dreaded:
net
net
net
The other mistake is taking a huge drive swing and trying to decelerate at the final instant. A good drop should feel like one continuous motion.
Think:
Lift through the ball, then let the paddle finish naturally.
Not: tap and stop.
6. The Drip: This One Should Finish Higher
The increasingly popular drip—part drive, part drop—is a useful example of why there is no single “correct” finish.
You’re hitting more aggressively than a normal drop, but you still need enough topspin and arc to bring the ball down.
Extend through the ball and then allow the paddle to rise toward the shoulder. Too much forward extension creates a flatter ball; too much vertical lift turns it into a loopy drop.
So the drip finish is roughly: through → up → shoulder.
That finish tells you something about the ball you’re trying to produce:
✔ more penetration than a drop
✔ more shape than a drive
@thepickleballclinic Canadian National Champion, Christina Chin shares TWO simple tips to master the drip! . . . . . . . . . . #pickleballaddict #pickleballers #pickleball #pickleballplayer #joola ♬ original sound – The Pickleball Clinic
7. The Forehand Drive: Yes, Finish Around Shoulder Height
This is the shot where the bigger finish belongs.
For a right-handed forehand drive, coaches commonly teach a low-to-high path with the paddle finishing around the left shoulder or left-ear area.
Why? Because a good drive involves:
extension through the ball
+
upward paddle travel
+
body rotation
If you do those three things, the paddle naturally travels farther than it would on a dink.
A drive that suddenly stops at your hip often means you’ve decelerated. A drive that finishes somewhere behind your back may mean you have over-rotated.
For most rec players:
Low → through → opposite shoulder.
is a very useful checkpoint.
But don’t literally force the paddle onto your shoulder. The shoulder is the destination your swing tends to reach when everything before it is working.
8. Backhands: The Finish Changes With the Shot
Backhand mechanics can get confusing because the correct finish depends heavily on where you are and what job the shot is doing.
A full two-handed backhand drive from the baseline or transition area uses extension, torso rotation, and a more complete follow-through. The paddle can continue across the body as the stroke finishes.
A two-handed backhand counter at the kitchen is much shorter. You’re using the opponent’s pace, so there’s no need for a big swing. The paddle moves through contact, finishes only a short distance across the body, then comes straight back to ready position.
A one-handed backhand counter is even more compact. Think of a firm, controlled punch or block: paddle in front, contact out in front of the body, then a short extension toward the target. The finish should stay relatively close to where contact happened rather than wrapping across your torso.
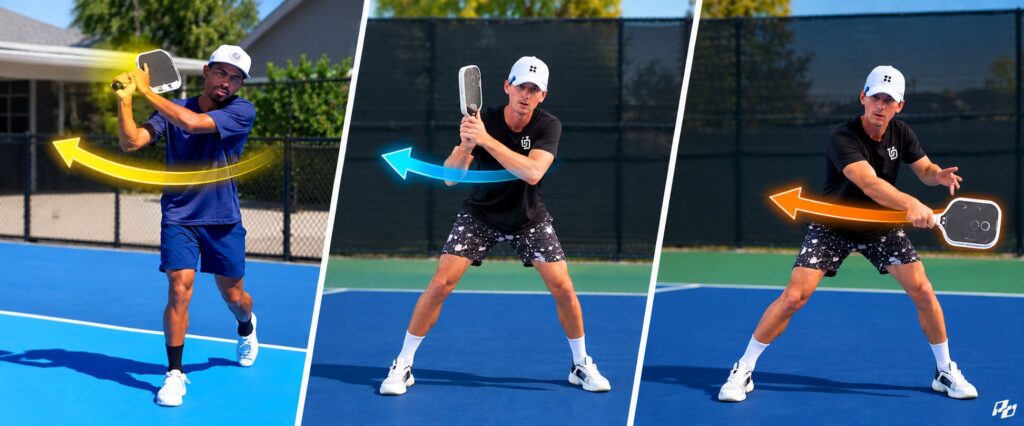
So:
Two-handed backhand drive: fuller finish across the body
Two-handed backhand counter: short across-body finish
One-handed backhand counter: compact forward finish, then recover
Same backhand side. Three different finishes.
Why?
Because the amount of time and pace available changes completely. The farther back you are and the more pace you need to create, the more complete the swing can be. At the kitchen, compactness and recovery matter much more.
9. The Serve: High Finish, But Let the Body Create It
A strong serve should not look like an arm swat. The swing travels from low to high, the body transfers forward, and the paddle continues after contact.
That means the finish usually ends high and across naturally, often around shoulder height or higher depending on the player’s style and spin.
But the important point is not to deliberately yank the paddle upward after the ball is gone. The finish should come from the acceleration pattern leading into contact.
Racket-sport biomechanics supports this broader idea: ball speed is tied to the coordinated movement of the legs, hips, trunk, shoulder and elbow before impact, while the follow-through allows the motion to decelerate afterward.
So if your serve finishes high because you drove from the ground, rotated, and swung through cleanly?
Great.
If you simply lift your paddle after contact because somebody said “finish high”?
That changes nothing.
10. The Return: Match the Finish to the Return You Want
Not every return requires the same finish.
- A deep topspin return can use a drive-style finish toward the shoulder.
- A flatter controlled return will generally finish more forward and slightly shorter.
- A slice return requires an open paddle face and a brushing/cutting path rather than a topspin-style upward finish.
This is why “always finish over your shoulder” is bad pickleball advice when applied to every shot.
The finish has to match the ball you’re trying to create.
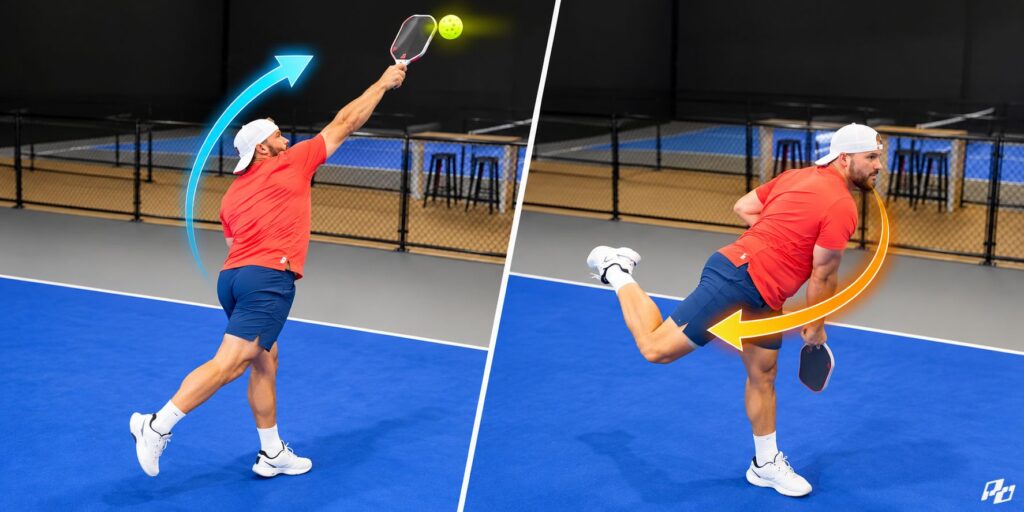
11. The Overhead: Finish Across to the Opposite Hip
This one has the clearest destination of the group.
The overhead is basically a throwing motion. You turn sideways, reach high, contact in front, and allow the paddle to travel down and across the body.
For a right-handed player, that means finishing toward the left side/left hip.
Think of throwing a ball downward. You would not throw it hard and then freeze your arm directly above your head.
Same idea:
The Follow-Through Cheat Sheet
For a right-handed player:
| Shot | Where the paddle generally finishes |
|---|---|
| Basic dink | In front / same side, compact |
| Topspin dink | Same-side ear area |
| Reset | Barely past contact |
| Block | Very short, near contact |
| Punch volley | Forward toward target |
| Roll volley | Upward and compact |
| Drop | Up and slightly forward |
| Drip | Up toward shoulder |
| Forehand drive | Left/opposite shoulder area |
| Two-handed BH drive | Across body with full rotation |
| Two-handed BH counter | Short across-body finish, then center |
| One-handed BH counter | Compact and forward, close to contact. |
| Serve | High, naturally across |
| Topspin return | Shoulder-height/full finish |
| Slice return | Forward/across on slice path |
| Overhead | Across toward opposite hip |
For a left-hander, reverse the sides.
A Drill I Really Like: Freeze the Finish
Hit five balls of each type and hold your natural finish for one second. Not because you’re supposed to play that way. You’re collecting information.
Try:
5 dinks
5 drops
5 drives
5 punch volleys
5 overheads
Then compare. Your finishes should look dramatically different.
If every shot ends at your opposite shoulder, you’re probably swinging too much on your soft game. If every shot ends six inches past contact, you’re probably cutting off your power strokes.
That contrast is exactly what you want to learn.
The Most Important Part: Don’t Pose the Finish
Here is where I think recreational players can get much more value from this.
The finish is a checkpoint, not an instruction to freeze in a predetermined pose.
If I tell you: “Finish at your shoulder,” and you hit badly but then physically place the paddle on your shoulder afterward, you haven’t fixed anything.
Instead, hit the shot and notice where the paddle naturally ended. That tells you about the swing that preceded it.
Dink finishes behind you?
Your swing is probably too big.
Drive finishes at your waist?
You may be cutting off the acceleration.
Reset finishes above your shoulder?
You’re probably adding too much energy.
Volley wraps around your torso?
Your stroke may be too long for the time available.
Overhead stops above your head?
You probably didn’t complete the throwing motion.
That’s why the finish can be such a useful coaching tool. It lets you diagnose the shot without trying to think about six different mechanical pieces at once.