
To improve your pickleball backhand flick, lower the paddle tip slightly, stay balanced through your legs, and swing up and around the ball. These three adjustments help create more spin, better disguise, cleaner contact, and a more reliable attack without overusing the wrist.
The backhand flick is one of those shots that makes intermediate players feel like they’re one tiny adjustment away from unlocking something dangerous. Usually, they are.
But the adjustment is rarely “swing harder.”
More often, the problem is one of three things: the paddle starts in the wrong position, the body is too passive, or the swing travels too straight through the ball.
Fix those, and the flick starts feeling less like a wrist gamble and more like a repeatable attack.
1. Let the paddle tip drop
This is the first change I’d make for the player whose flick feels flat, obvious, or strangely powerless.
For a backhand flick, start with the paddle angled diagonally downward and the wrist loaded, then accelerate upward through contact. Lowering the paddle tip gives you more room to accelerate up and around the ball instead of simply punching forward.
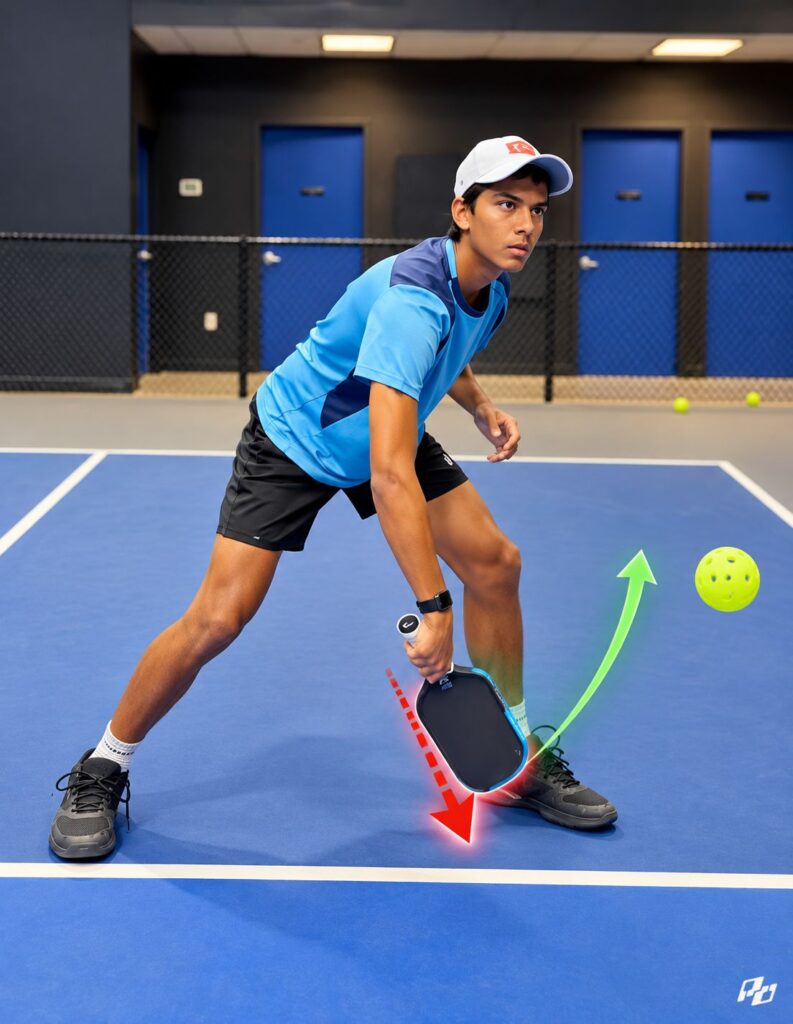
Who benefits most?
The player who says:
“I can hit it hard, but it doesn’t dip.”
Or: “My flick looks exactly like a push volley.”
Or: “Every time I try to add spin, I just send it long.”
Those players are often starting with the paddle too upright and then trying to manufacture spin at the last instant.
That usually creates one of two misses: straight into the net because the face closes too much, or long and high because they flip the face open trying to lift the ball.
If your backhand flick keeps sailing long, the issue may be an overly open paddle face or contact happening too close to your body. Instead of adding more wrist, try taking the ball farther in front and cleaning up the paddle angle.
What should it feel like?
Not: “Point the paddle at the floor.”
Think: “Let the tip hang slightly below my hand, then unwind.”
The setup should still feel relaxed.
One experienced player who spent months developing the shot describes it almost like throwing a Frisbee: coil the wrist while staying loose, then briefly add tension and release through contact. Staying tense through the entire motion was one of the biggest mistakes he saw.
That is the subtle part. Tip down does not mean wrist locked down. You are creating range of motion, not stiffness.
The mistake to avoid
Don’t exaggerate this cue until the paddle is hanging vertically and your forearm is contorted.
Mari Humberg’s famous backhand flick is extremely wrist-dominant, but even teaching around her shot emphasizes that players should build it from balance and compact motion rather than trying to copy an extreme snap immediately:
@kevindongpickleball Mari Humberg with the flick and the dropper all in one point! This was part of the 5s undefeated weekend in NYC last weekend. If you want to see Major League Pickleball in person, you can use KEVINDONG for 10% off your ticket. Follow for more pickleball highlights, tips, and clips #pickleball #pickleballhighlights #propickleball #pickleballtournament #pickleballmemes #pickleballtips #pickleballathlete #kevindongpickleball #kevindong #marihumberg #majorleaguepickleball @Major League Pickleball @The 5s | MLP Pickleball ♬ original sound – Kevin Dong Pickleball
For most rec players: small paddle drop, clean contact, then accelerate.
That is enough.
2. Load the body before you flick
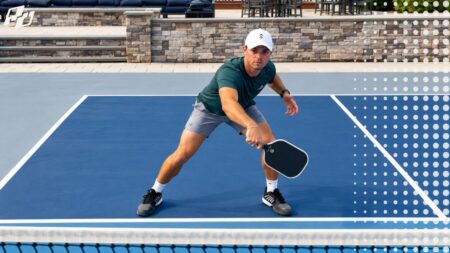
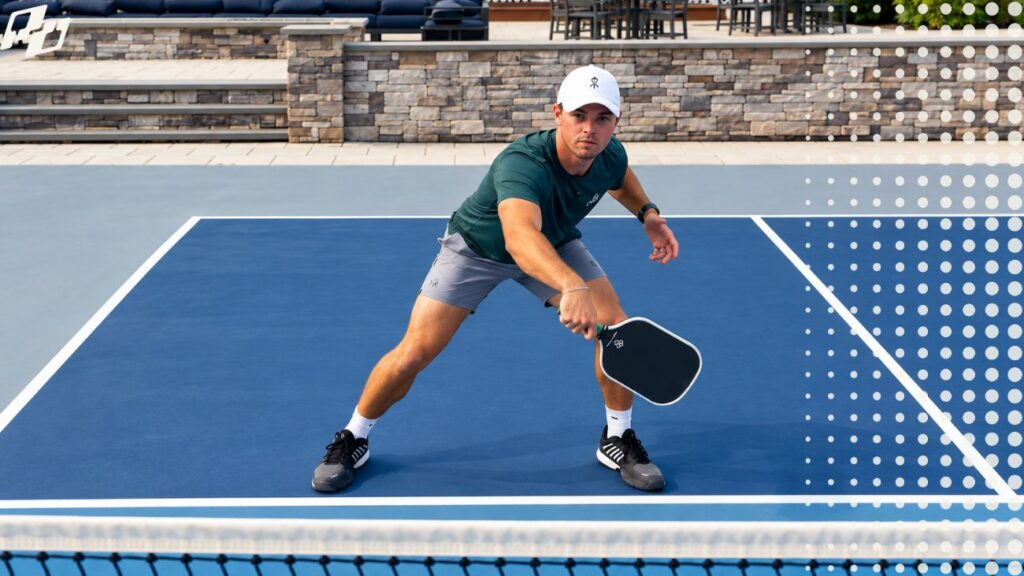
For a stronger backhand flick, load into the ground before the paddle accelerates.
Many intermediate flicks become too hand-dominant: the feet stop, the knees straighten, the player reaches, and the wrist ends up trying to create the entire shot.
That’s when the flick tends to feel weak and unstable.
Who benefits most?
The player whose flick:
- has spin but no depth
- feels different every time
- leaves them leaning after contact
- or makes them late for the counter
These players usually don’t need more wrist. They need a better platform underneath the wrist.
Good flick instruction repeatedly emphasizes being balanced, forward, and established before accelerating. Mari Humberg’s teaching, for example, puts balance first and warns against flicking while reaching or lunging.
Why the leg matters
A little pressure into the ground does three things.
- It stabilizes your head.
- It lets the hips and torso contribute some force.
- And, most importantly, it helps you recover immediately after the flick.
That last one matters because your flick usually comes back. If you finish the shot falling sideways, your opponent doesn’t need a brilliant counter.
They only need to make you hit another ball.
What should it feel like?
For a right-handed player, if the ball is slightly to the backhand side, you may naturally feel more pressure through the left leg.
That’s fine. But don’t turn “left foot” into a rule. Depending on where the ball arrives, you may be relatively even on both feet.
The better cue is: “Sit slightly, load, then rise into the shot.”
Not a jump.
Not a lunge.
Just enough leg pressure that the hand isn’t working alone.
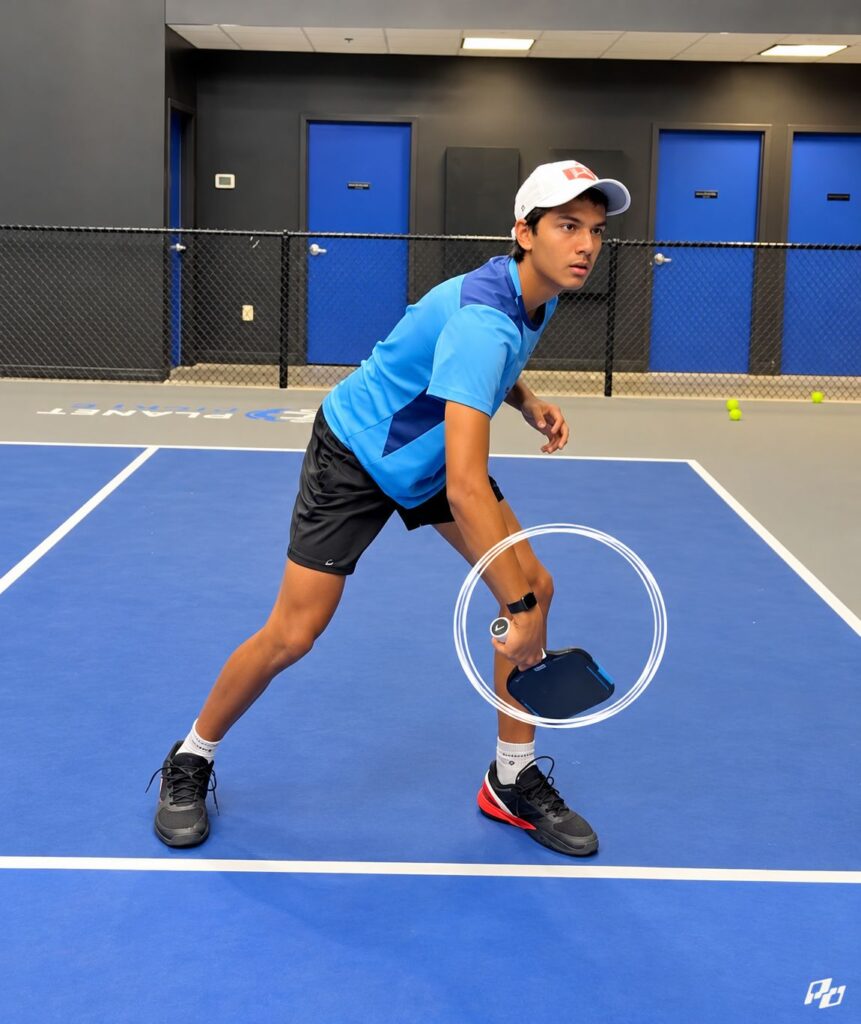
The common mistake
Players hear “push off the leg” and turn the flick into a full-body launch. Now the shot gets bigger.
The torso opens early.
The opponent sees it coming.
And the ball flies.
The body should support the flick, not announce it.
Think: quiet upper body, stable legs, fast finish.
3. Curve around the ball instead of punching through it
This is probably the best adjustment for the player who can flick hard but can’t keep the ball down.
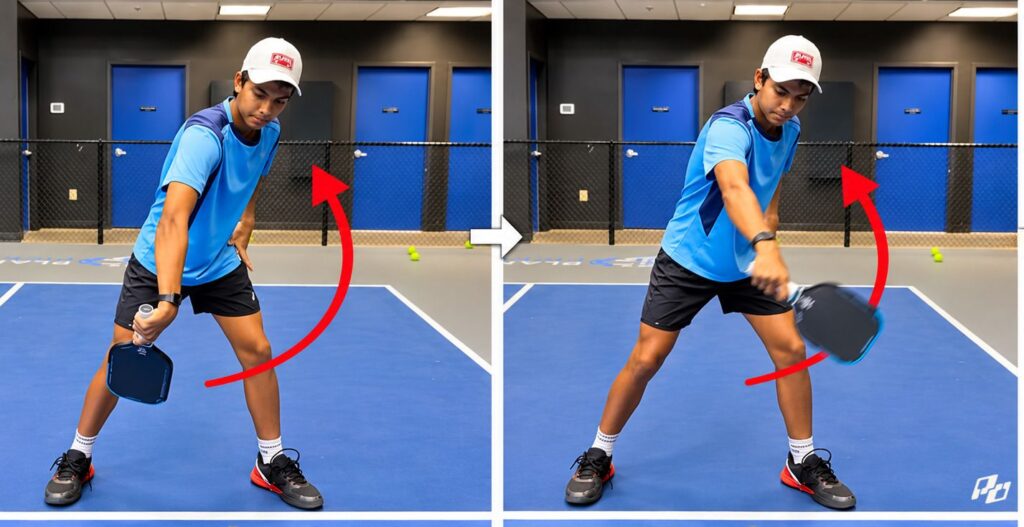
A straight forward swing produces pace. A curved, low-to-high swing gives you more shape.
Mari Humberg’s flick is often taught with a windshield-wiper-style path, where the paddle travels upward and around rather than simply straight through the back of the ball.
The cue—brush the outside of the ball—can be very useful here:
Who benefits most?
The player whose flick:
- keeps going long
- feels like a slap
- has little topspin
- or is easy for opponents to read
These players are usually trying to send the ball directly toward the target. That sounds logical. But it can make the motion too linear.
The better idea is to let the paddle travel around and upward, with the ball leaving somewhere in the middle of that arc.
@tanner.pickleball How To Hit a Backhand Flick In Pickleball! 🏆🥇 👉 Featuring: Mari Humberg 1️⃣ Paddle tip facing the ground. 2️⃣ On contact, swing from low to high (windshield wiper motion). 3️⃣ Be ready for the next ball! #pickleball #pickleballtiktok #pickleballrocks #pickleballaddict #pickleballtips #pickleballers #pickleballislife #pickleballaddiction ♬ original sound – Tanner.pickleball
Why “outside of the ball” helps
It encourages you to create spin without opening the paddle face. It also makes disguise easier.
A small curved path can send the ball at the body, hip, middle, or wider angle without a huge backswing.
That is one reason flick specialists are so difficult to read.
One advanced-player discussion describes good flickers as deceptive precisely because the same compact wrist motion can produce different directions, heights, and spins before the opponent has time to identify the target.
The mistake to avoid
Do not interpret “brush the outside” as: hit the side of the ball as thinly as possible.
Then you get weak contact, mishits, and balls that float. You still need to hit through enough of the ball to create pace.
Think: through first, around second.
Or an even simpler cue: “Drive the ball, but finish around it.”
That gives you pace plus shape.
Which of the three fixes do you actually need?
Here’s the useful part. Don’t change all three at once. Use the miss to diagnose the problem.
| Your flick does this | Try this first |
|---|---|
| Flies long and flat | Lower the paddle tip and create more upward shape |
| Feels weak or all wrist | Load into your legs and stay balanced |
| Has pace but no dip | Curve around the outside of the ball |
| Pops up | Move contact farther in front and check paddle face |
| Works in drilling but falls apart in games | Simplify the body motion and shrink the swing |
| Leaves you unable to handle the next ball | Reduce power and improve balance/recovery |
That last one is especially important. A good flick is not the one that looks most violent.
It’s the one that lets you hit another shot.
The biggest mistake: trying to use all three cues at full intensity
This is where the shot falls apart.
Players hear: tip down + push off + brush hard.
…and suddenly they’re performing three exaggerated movements at once.
The paddle drops too far.
The legs jump.
The wrist snaps.
The swing wraps violently across the body.
Technically, they followed every instruction. Practically, they built a circus shot.
These are small adjustments.
A little more paddle-tip drop.
A little more body underneath the shot.
A little more curved path.
That’s usually enough.
Experienced players who have spent serious time developing the flick consistently emphasize compactness, relaxation, and clean contact rather than maximum effort.
Try the three-shot test
Next drilling session, hit 10 flicks with your normal technique. Then make one adjustment.
Round 1: Paddle tip
Ten balls.
Only think: Tip slightly down. Contact in front.
Round 2: Body
Ten balls.
Only think: Load. Stay forward. Recover.
Round 3: Swing path
Ten balls.
Only think: Through, then around.
Which change gives you the biggest improvement? That’s probably your missing piece.
Not everybody needs all three equally. The player with great hands but poor balance may transform the shot with tip #2. The stable player who hits everything flat may need #3.
And the player who has never figured out how good flickers create spin from such a tiny motion may finally understand it when the paddle tip starts lower.
That’s why these three cues are useful.
They’re not three steps you must perform perfectly. They’re three different fixes for three different problems.
And once you know which problem you actually have, the backhand flick gets much easier to solve.